 |
| New side patio |
 |
| Old side patio |
Hey!
Do you see my precious grand-fur baby Athena? She's such a cutie!
I love spring BUT I love summer too, (actually I love certain aspects of all the seasons). But we're talking about summer and all the wonderful things that come during this season.
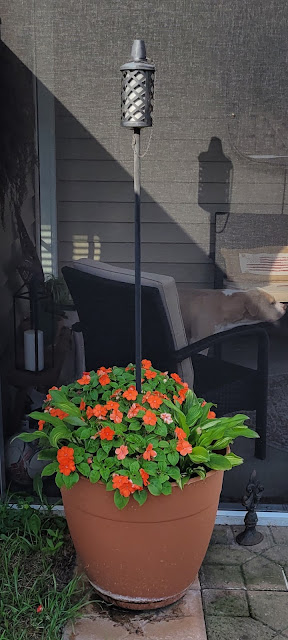
We sit outside alot and like many people we used tiki torches. Unfortunately sometimes they don't work well, however they do give a wonderful glow at night. Don't you think?
★I am not affiliated with any company/business shared on my website. So I do not receive any form of compensation ★


xo, Tina
sharing: will blog for comments , love your creativity, inspire me monday inspire me monday, senior salon pit stop, tuesday turn about , creatively crafty, inspire me tuesday, karins kottage party, vintage charm party, thursday favorite things, farmhouse friday

The Idea:
Two summers ago I was shopping for more tiki canisters and solar lighting when an idea popped in my head. Instead of buying the canisters and lighting; why can't I have DH replace the old canisters with the lights? I told DH my idea and he said yep he could do it! We got our supplies and home we went...
 |
| I see Shelby! |
Supplies:
- Tiki lights w/metal post
- Solar landscape lights
- Dowel rod
- Belt sander
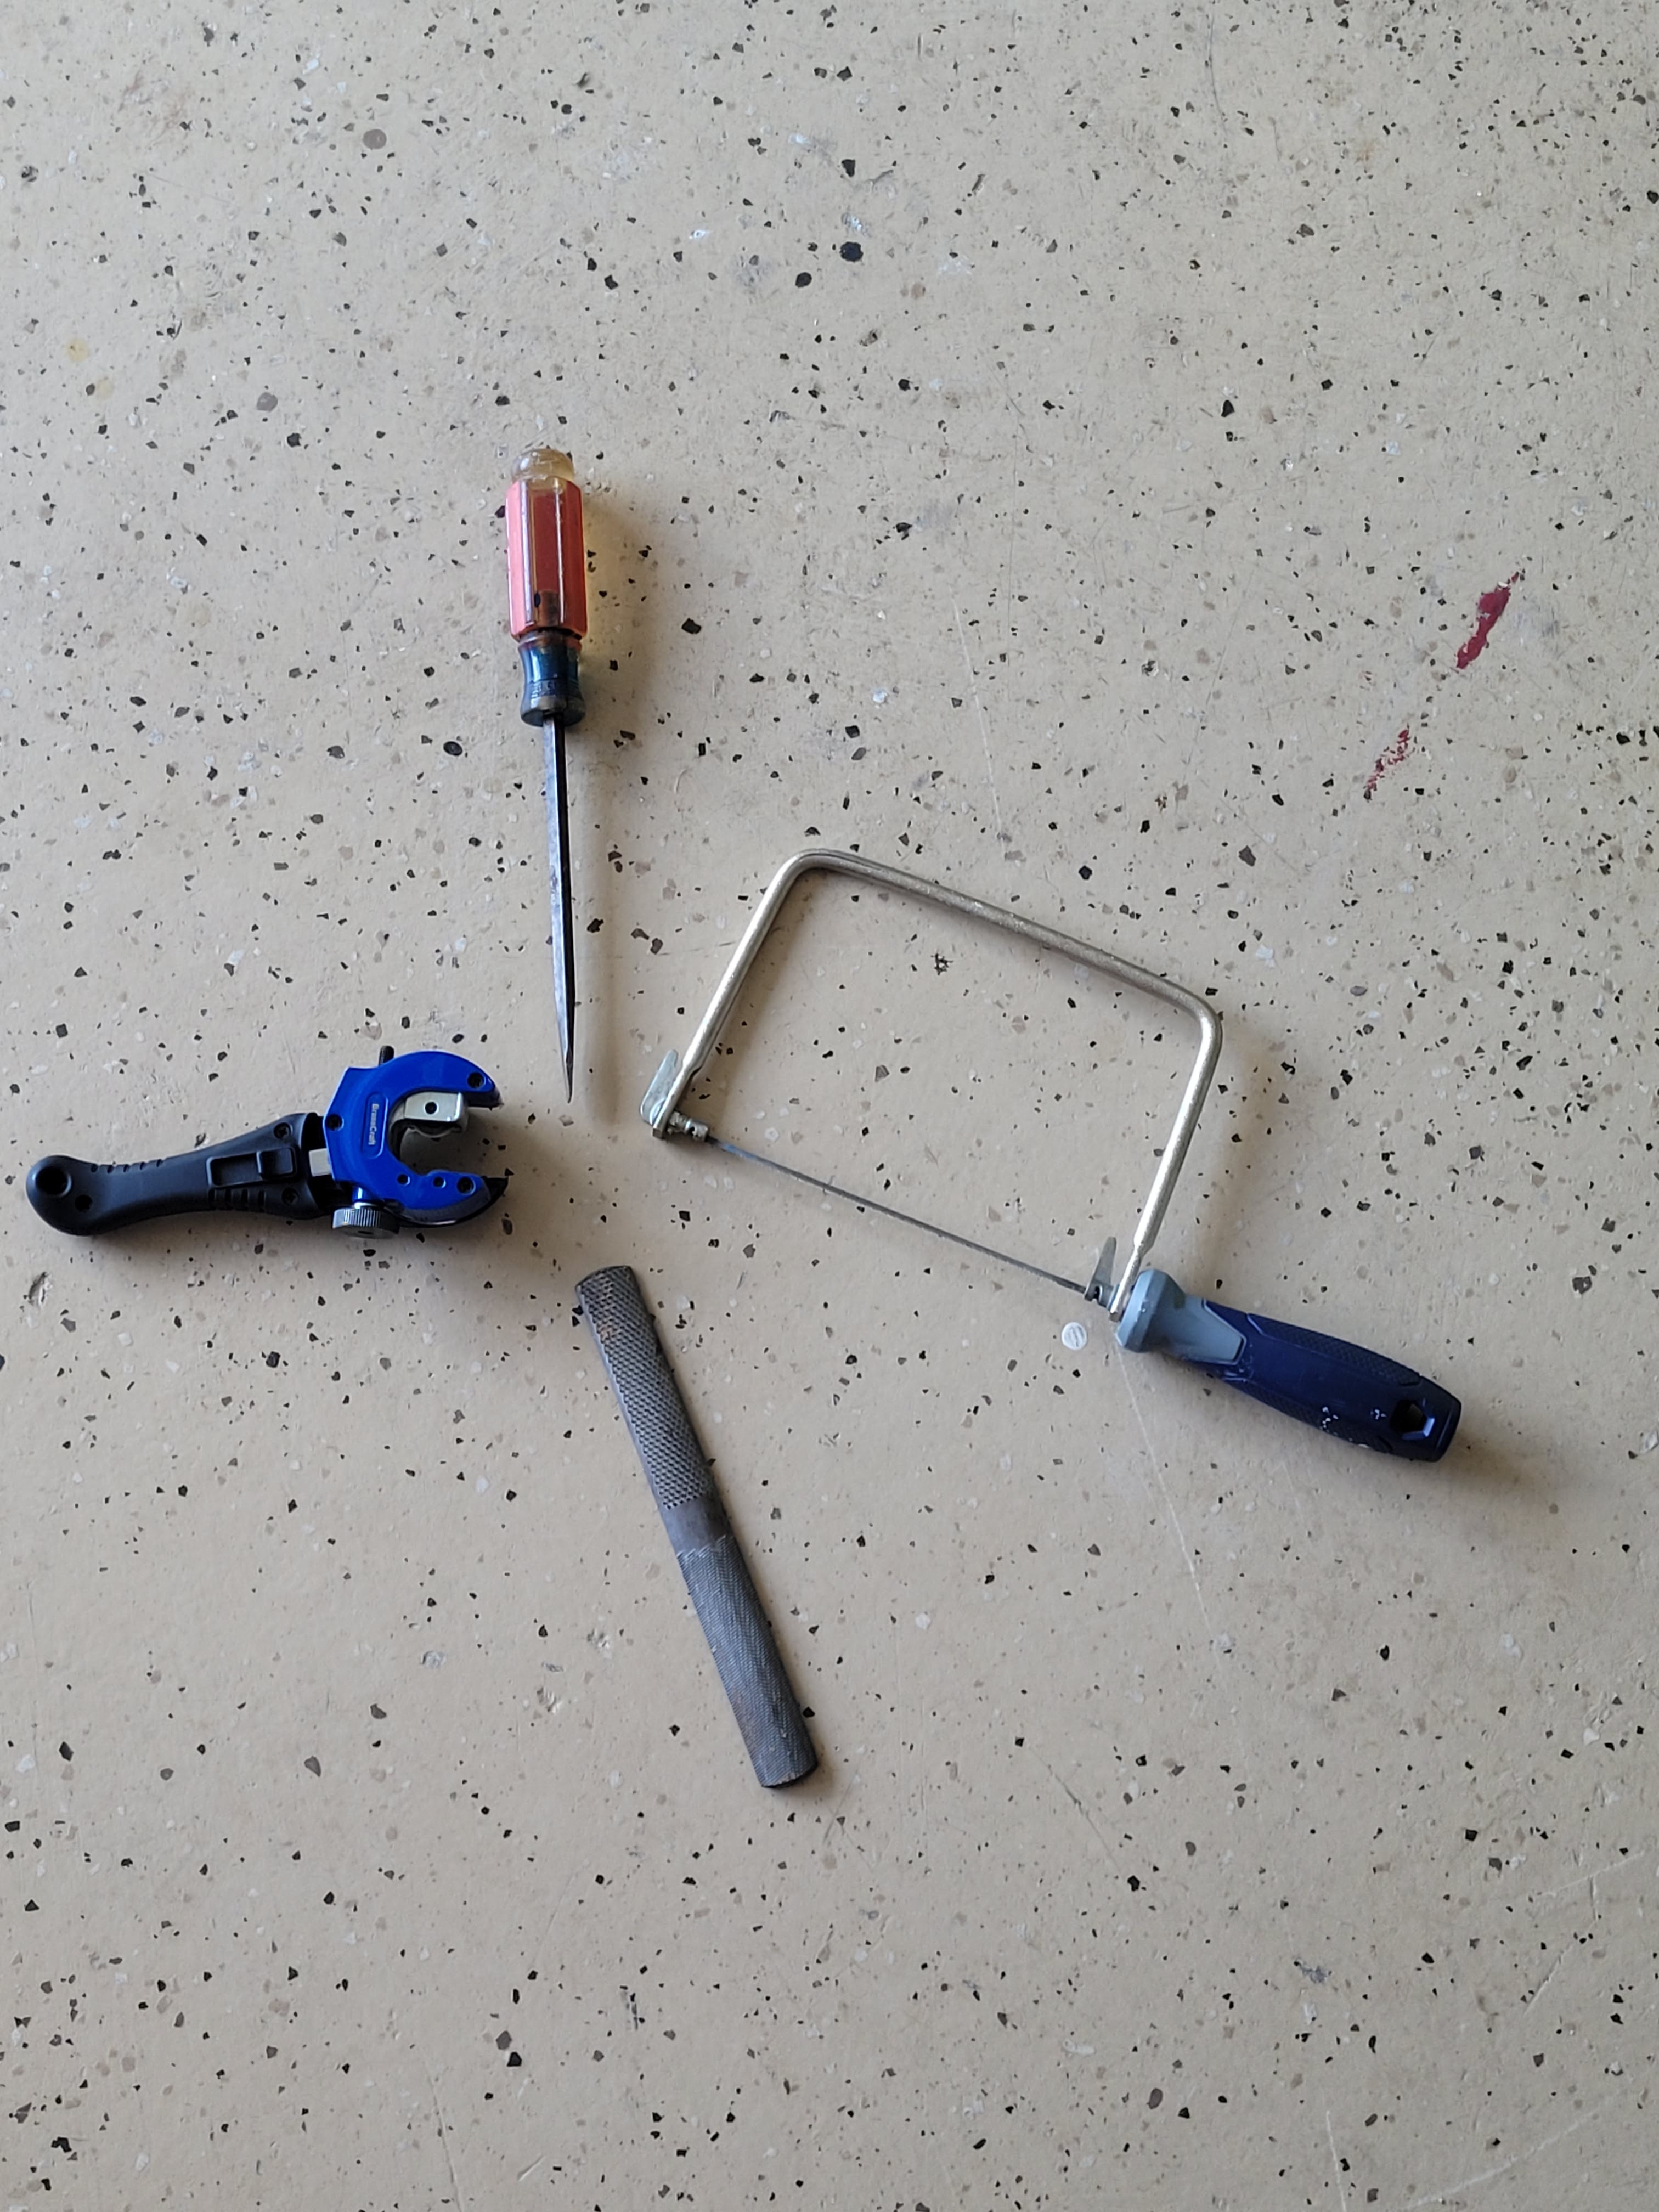
- Screwdriver
- Pipe cutter
- Small hand saw
- File
- Small screws

(If you're placing your torches in a pot, like I did; you'll need the following supplies)
- Quick dry cement
- Empty jars (dry roasted peanut jars work great)
- A few empty water bottles
- X-large flower pots
- Soil
- Plants (I have hostas in the ones shown)
Assemble:
Quick note: After a few cuss words while trying to remove the canister holder from the post Jeff (DH) decided to cut the pipe 2in below the canister.
- Remove canister
- Remove canister holder

- Measure hole, if dowel is too small go up one size.
- If the larger dowel is too big use the belt sander to make it a snug fit in the post & base of the light.


- Insert dowel
- Add light then secure with small screw.

Use in flower pots
- Grab your jar and a metal rod similar in diameter to the post for the tiki light.
- Trace around the rod in the center of the jars lid.
- Cut out hole

- Next fill the jar with Quick set cement
- Insert metal rod and allow to dry
- Once set remove rod, screw on lid, then insert light


Use in Flower Pots
- Grab your xx-large flower pot
- Place jar in flower pot
- Throw in some empty water bottles (it takes up space so you don't use as much soil)
- Then add your soil and plants.


There you have revamped tiki lights! Granted they don't keep the mosquitoes away but they look pretty and you don't have to worry about a flame.
What do you think?
sharing: will blog for comments , love your creativity, inspire me monday inspire me monday, senior salon pit stop, tuesday turn about , creatively crafty, inspire me tuesday, karins kottage party, vintage charm party, thursday favorite things, farmhouse friday
0 comments
THANK YOU for commenting, ❤