Back a couple of years ago while perusing the World Market website I came across these candle holders. I had seen them on an Instagram account before, thought they were cute so I bought them. Unfortunately after having them a month or so I really didn't care for them, so into a drawer they went.
One day around Thanksgiving as I was searching through the drawers I saw them and an idea to "re-use" them popped in my head. I had been eyeing candle holders similar to these for a while, so I
Supplies
- Clear Gorilla Glue for crafts
- 4 - 5in round plaques
- 4 - 4in round plaques
- 6 pkg ½in round beads w/⅛in hole
- White nylon thread
- Hot glue + glue gun
- Black craft paint
- Antique gold rub & buff
- 2 sets of 3 'whitewash and gold bottle taper candle holders '
Assembling
- Wipe down candle holders
- Apply glue around the top edge of holders (below)
- Once glue is applied flip matching holder and place on top. Apply pressure until set (30 seconds)
- Repeat with remaining holders
- Once glued let it setup for about 24 hours.
- Grab 3 - 4in round plaques and mark center. Place holder on top and trace around bottom.
- Next glue a 4in round plaque to a 5in round plaque. Let setup for 24 hours.
- Then glue holders to base. Let set for 24 hours
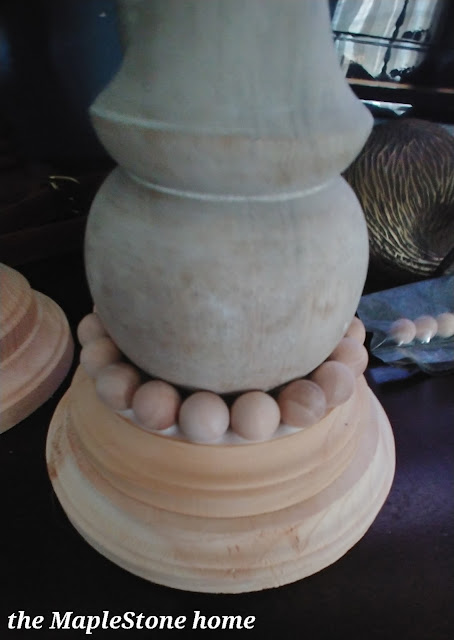
- Once set glue beads around base of holder and plaques
So what do you think? Do you have candle holders that can be re-used?


They turned out very nice!
ReplyDeleteThank you!
DeleteWhat a great makeover! These candle holders are beautiful!
ReplyDeleteThank you 😊
DeleteAbsolutely gorgeous!
ReplyDeleteThank you! 😊
DeleteWhat a fabulous makeover, they look so different! These lovely candle sticks will be featured at Handmade Monday this week :-)
ReplyDeleteThank you very much!😊
DeleteAmazing transformation!
ReplyDeleteThank you!
DeleteThis is a great repurposed project! I enjoyed this post so much and I wanted you to know that this post will be featured on Tuesday Turn About Link Party this week! Pinned to our Tuesday Turn About Pinterest board.😊 Thanks for sharing your tips/project/makeover and I hope to see you at the party this week! 😊
ReplyDeleteThank you so much!
DeleteI'm a sucker for a creative upcycle and this one is fabulous...love the beads!!
ReplyDeleteSo am I and thank you!
DeleteIt's great to see you finding a way to repurpose these candle holders! Sometimes items deserve a second chance to shine in a new light. Looking forward to Invisible Text seeing how you give them a fresh look for Re-use It Wednesday.
ReplyDeleteThank you!
Delete