
Lifestyle
newsletter


xo Tina
sharing: will blog for comments , love your creativity, inspire me monday inspire me monday, senior salon pit stop, tuesday turn about , creatively crafty, inspire me tuesday, karins kottage party, vintage charm party, thursday favorite things, farmhouse friday
A Note from Tina | № 11
Welcome to 'A Note from Tina'. A monthly note where you can catch-up on all the projects, d.i.y.s, crafts, recipes, and life here at Maples & Stone. So grab your favorite drink and join me for a few.
☆FYI: Monthly posting schedule: (this may vary depending on the month or how much is accomplished)
- 1st Monday - Recipes
- 2nd Monday - DIY, Re-use It, and/or Did you know,
- 3rd Monday - Tips & Tricks and/or Room Reveals
- 4th Monday - What I've Read,
- Last Day of month - A Note from Tina (newsletter)
★I am not affiliated with any company/business shared on my website. So I do not receive any form of compensation★
 |
| This guy was just a chillin' in my garden |
Life Lately: Good bye June....Hello July!
- June was busy just like May! My oldest grandson D drove up for a week. I miss him & it was great to see him.
- My middle grandson 'J' is here for the whole summer. It's fun having a 12 year old around!
- Our granddaughter 'S' (9yrs) lives in the neighboring town, she comes to visit but gets bored, lol. She doesn’t understand why her brother 'J' doesn't want to spend 24/7 with her, lol! She will learn eventually (we hope).
 |
| Grand fur-baby Wolfie enjoying the dirt! |
- Finally all the dirt saved from the driveway extension, sidewalk and side patio is spread and grass seed is down and starting to grow, Yes! Trying to keep the fur babies out has been 'oh so fun' (sarcasm).
- My garden is doing good but not as well as years past!


 |
| Hot Thai peppers 🌶 yes they are hot 🔥 |
- I've started working on garden ideas for next year!
Around the Web:
- Cottages and Bungalows has an article on Homemade Bug Repellent for your outdoor summer fun
- Do you follow Cindy of @windowboxcottage she's so sweet and her home is so beautiful! If you don't have instagram you can check her home out HERE
Shopping:
- Not much to talk about besides groceries, I don't think you want to hear about that. Except this pineapple cream cake, it was so moist & delicious! Bought it from a local store Pate's Farm Market.

June on the Blog:
- Something New Sunday
- Taquito Casserole
- Spring & Summer Wreath | Design 4
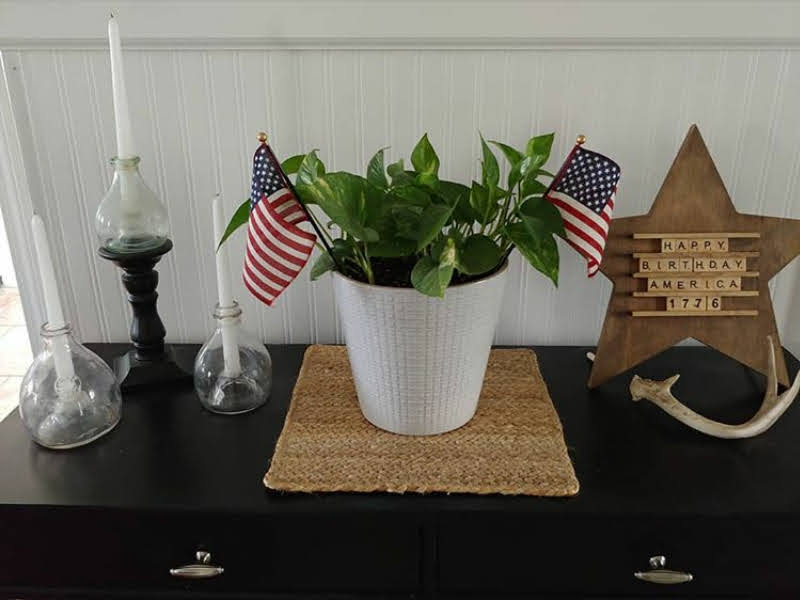
- Did You Know | Flag Etiquette
- Reuse It | Tiki torches to Solar lighting
- Reuse It | Gothic Fence Finial Flag Holder
- What I've Read | June²⁰²⁴
That's all folks! :)
P.S. Be safe and have fun this upcoming 🇺🇸 Independence Day 🇺🇸
sharing: will blog for comments , love your creativity, inspire me monday inspire me monday, senior salon pit stop, tuesday turn about , creatively crafty, inspire me tuesday, karins kottage party, vintage charm party, thursday favorite things, farmhouse friday
Reading Nook


Thank you very much for being here!
Have a great day!
❦ Hugs,Tina ❦
you'll find me sharing at the parties listed here
What I've Read | June 2024

Hello sweet friends and Welcome to 'What I've Read'.
If you're new here this is a monthly post of the books I've read either on Kindle or in physical form, or listened to on Audible or Chirp. Hopefully you enjoy this months books or if you've read any let me now what you thought in the comments below. If you want to see more of the books I've read go here. The Reading Nook - What I've Read is posted on the 4th Monday of the month.
Happy Reading!
● A Year of Puttery Treats (June chapter)
Author: Alison May | Available: Kindle HERE | Published: April 2019 | This book covers each month as chapters and has fun ideas/inspiration for each.

Welcome to A Year of Puttery Treats. One gorgeous, life-enhancing little something to do for each of the 365 days in the year.
Housekeeping you see, can be terribly dull. A monotonous round of chasing dirt and moving objects that we should seek to enhance with the kind of decorative little to-do’s that gladden the heart and help to bring both order and authenticity in to our homes.
While the treats vary from the pretty to the silly, the fragrant and the celebratory, they are each designed to remind us that keeping house is about more than getting busy with a vacuum and a duster and should instead be about enhancing the lives of those that live in our homes. In reflecting the soul of the Mistress of the house and marking the lives of those she shares it with, puttery treats are quite the most lovely way to ritualise life within our own four walls and more than that to celebrate the art of homemaking and bring joy to domesticity.
In a Year of Puttery treats you will find seasonal tasks and little to-dos for annual holidays and national celebrations. You will discover ways to journal your days and create a living museum of family life. You will find tiny pampering treats and scrubby housekeeping tips, and in the midst of it all, right there in the heart of your home you will find yourself…
● The Summer House
Author: Alison May | Available: Kindle (only) | Published: April 2019 |"The Summer House (The Seasonal House Series Book 2)".

The Summer House is the second of five seasonal titles from BrocanteHome.Net’s best-selling Seasonal House series.This pocket-sized book is a cornucopia of Summertime homemaking inspiration, with ideas for preparing for the change of the season, Summer puttery treats, cleaning recipes, decorative touches, journal prompts, a book list and an essay on living well in Summertime, written with all the same charm Alison May has been bringing to the world of vintage housekeeping for over twelve years now...

● Patina Style, Patina Living, Patina Farms & Patina Homes
Authors: Brooke Giannetti & Steve Giannetti | Available: Amazon, Kindle & Patina Home & Garden | Love these books
Patina Style: The Giannettis have developed a home design style that embraces age, patina, weathered and worn surfaces, and rough surfaces. Patina Style is a color palette, a romance with subtlety, an attraction to natural materials and architectural details. It is at once old-world, contemporary, and mildly industrial. Patina Style gives insight into materials choices, methods and treatments that result in spaces that celebrate beauty in the old, the imperfect, the slightly roughed-up.Patina Farm: When Brooke and Steve Giannetti decided to leave their suburban Santa Monica home to build a new life on a farm, they looked into themselves, and traveled to Belgium and France, for inspiration. Brooke’s inviting prose combines with 200 photographs and Steve’s architectural drawings to show their inspirations, their materials selections, and the enviable result of their team effort and creativity: an idyllic farm in California’s Ojai Valley. We see every corner of the family home, guesthouse, lush gardens, and delightful animal quarters.Patina Living: An intimate look at life on Patina Farm enjoying the interplay of rustic and modern European farmhouse charm―including the sheds, outbuildings and well-designed gardens where the Giannetti's entertain and enjoy their miniature goats, sheep and donkeys, the chickens and ducks, and dogs. In addition to the home, charming sheds and outbuildings in the Patina landscape are inspiration for a beautiful life in the popular Patina Style.Patina Homes: Steve Giannetti’s architectural designs springboard from his image of ultimate beauty— a place where modern, classical and industrial elements merge to create a unique style with a modern sense of space and emotion drawn from history. His materials palette consists of wood, metal, and stone. His color palette is a chalky patina. Twelve varied homes—ranging from a modern desert glass box and a beachfront contemporary to a historic East Coast farmhouse and a Provencal-style home in California—show how Steve has used these themes to solve unique architectural challenges. Steve has collaborated with his wife, Brooke, as well as other designers on the various interiors.
Have you read any of these books?
Happy Reading! 📚
you'll find me sharing at the parties listed here
Featured
Let's Create
Re-use It


After being moved to many times to count, no longer owning a desktop and not having a place to put it; the time had come to retire it.


xo Tina
sharing: will blog for comments , love your creativity, inspire me monday inspire me monday, senior salon pit stop, tuesday turn about , creatively crafty, inspire me tuesday, karins kottage party, vintage charm party, thursday favorite things, farmhouse friday
Re-use It | Gothic Fence Finial to Flag Holder

Welcome to 'Reuse It'. A monthly post where I reuse items around my home in different ways.
★I am not affiliated with any company/business shared on my website. So I do not receive any form of compensation ★


Back in the early 2000's while stationed in Wisconsin. We were living in a small 3 bedroom town house. We needed a place for our desktop and printer, but computer desks were to big for the only area to put one. I gathered a tape measure, ruler, pencil, paper and an inspiration photo and got to work creating this cabinet (above). I used Gothic style fence finials for the feet.


Back in the early 2000's while stationed in Wisconsin. We were living in a small 3 bedroom town house. We needed a place for our desktop and printer, but computer desks were to big for the only area to put one. I gathered a tape measure, ruler, pencil, paper and an inspiration photo and got to work creating this cabinet (above). I used Gothic style fence finials for the feet.

After being moved to many times to count, no longer owning a desktop and not having a place to put it; the time had come to retire it.
While Jeff was taking it apart the one request I had was to save the feet.
Supplies:
- Gothic style fence finials
- Drill + bit (bit is the size of dowel on flags)
- 2in 4×4 block of wood (to make taller)
- Paint or stain (optional)
- Wood glue
- Sandpaper
- 5 small American Flag
- Clamp
- Nail + nail gun
Assembly:
- Make sure your drill bit is of similar in size (not smaller) to the dowel of the flag.
- Mark where the holes are to go. I have 5, 1 center top, 1 in each of the 4 sides.
- Drill holes on sides at a 60⁰ (degree) angle, about halfway down. Insert a flag to verify that it's neither too small or too big.
- If you've got any rough spots after drilling the holes sand little.
- Attach the base (4×4×2) with glue and clamp, or nails
- Once dry paint or stain.
Now that your flag holder is finished, add the flags and place anywhere your heart desires! The great thing about this (depending on the color), is if you have the long, slender candles ( here ), it can be used year round.


What do you think?
sharing: will blog for comments , love your creativity, inspire me monday inspire me monday, senior salon pit stop, tuesday turn about , creatively crafty, inspire me tuesday, karins kottage party, vintage charm party, thursday favorite things, farmhouse friday
♡♡Featured here
Let's Create
Re-use It
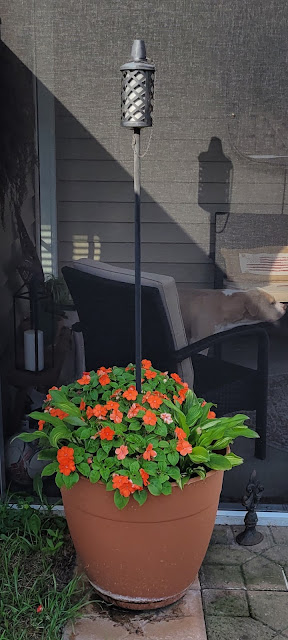
Re-use It | Tiki Lights to Solar Lights
 |
| New side patio |
 |
| Old side patio |
Hey!
Do you see my precious grand-fur baby Athena? She's such a cutie!
I love spring BUT I love summer too, (actually I love certain aspects of all the seasons). But we're talking about summer and all the wonderful things that come during this season.
We sit outside alot and like many people we used tiki torches. Unfortunately sometimes they don't work well, however they do give a wonderful glow at night. Don't you think?
★I am not affiliated with any company/business shared on my website. So I do not receive any form of compensation ★


xo, Tina
sharing: will blog for comments , love your creativity, inspire me monday inspire me monday, senior salon pit stop, tuesday turn about , creatively crafty, inspire me tuesday, karins kottage party, vintage charm party, thursday favorite things, farmhouse friday

The Idea:
Two summers ago I was shopping for more tiki canisters and solar lighting when an idea popped in my head. Instead of buying the canisters and lighting; why can't I have DH replace the old canisters with the lights? I told DH my idea and he said yep he could do it! We got our supplies and home we went...
 |
| I see Shelby! |
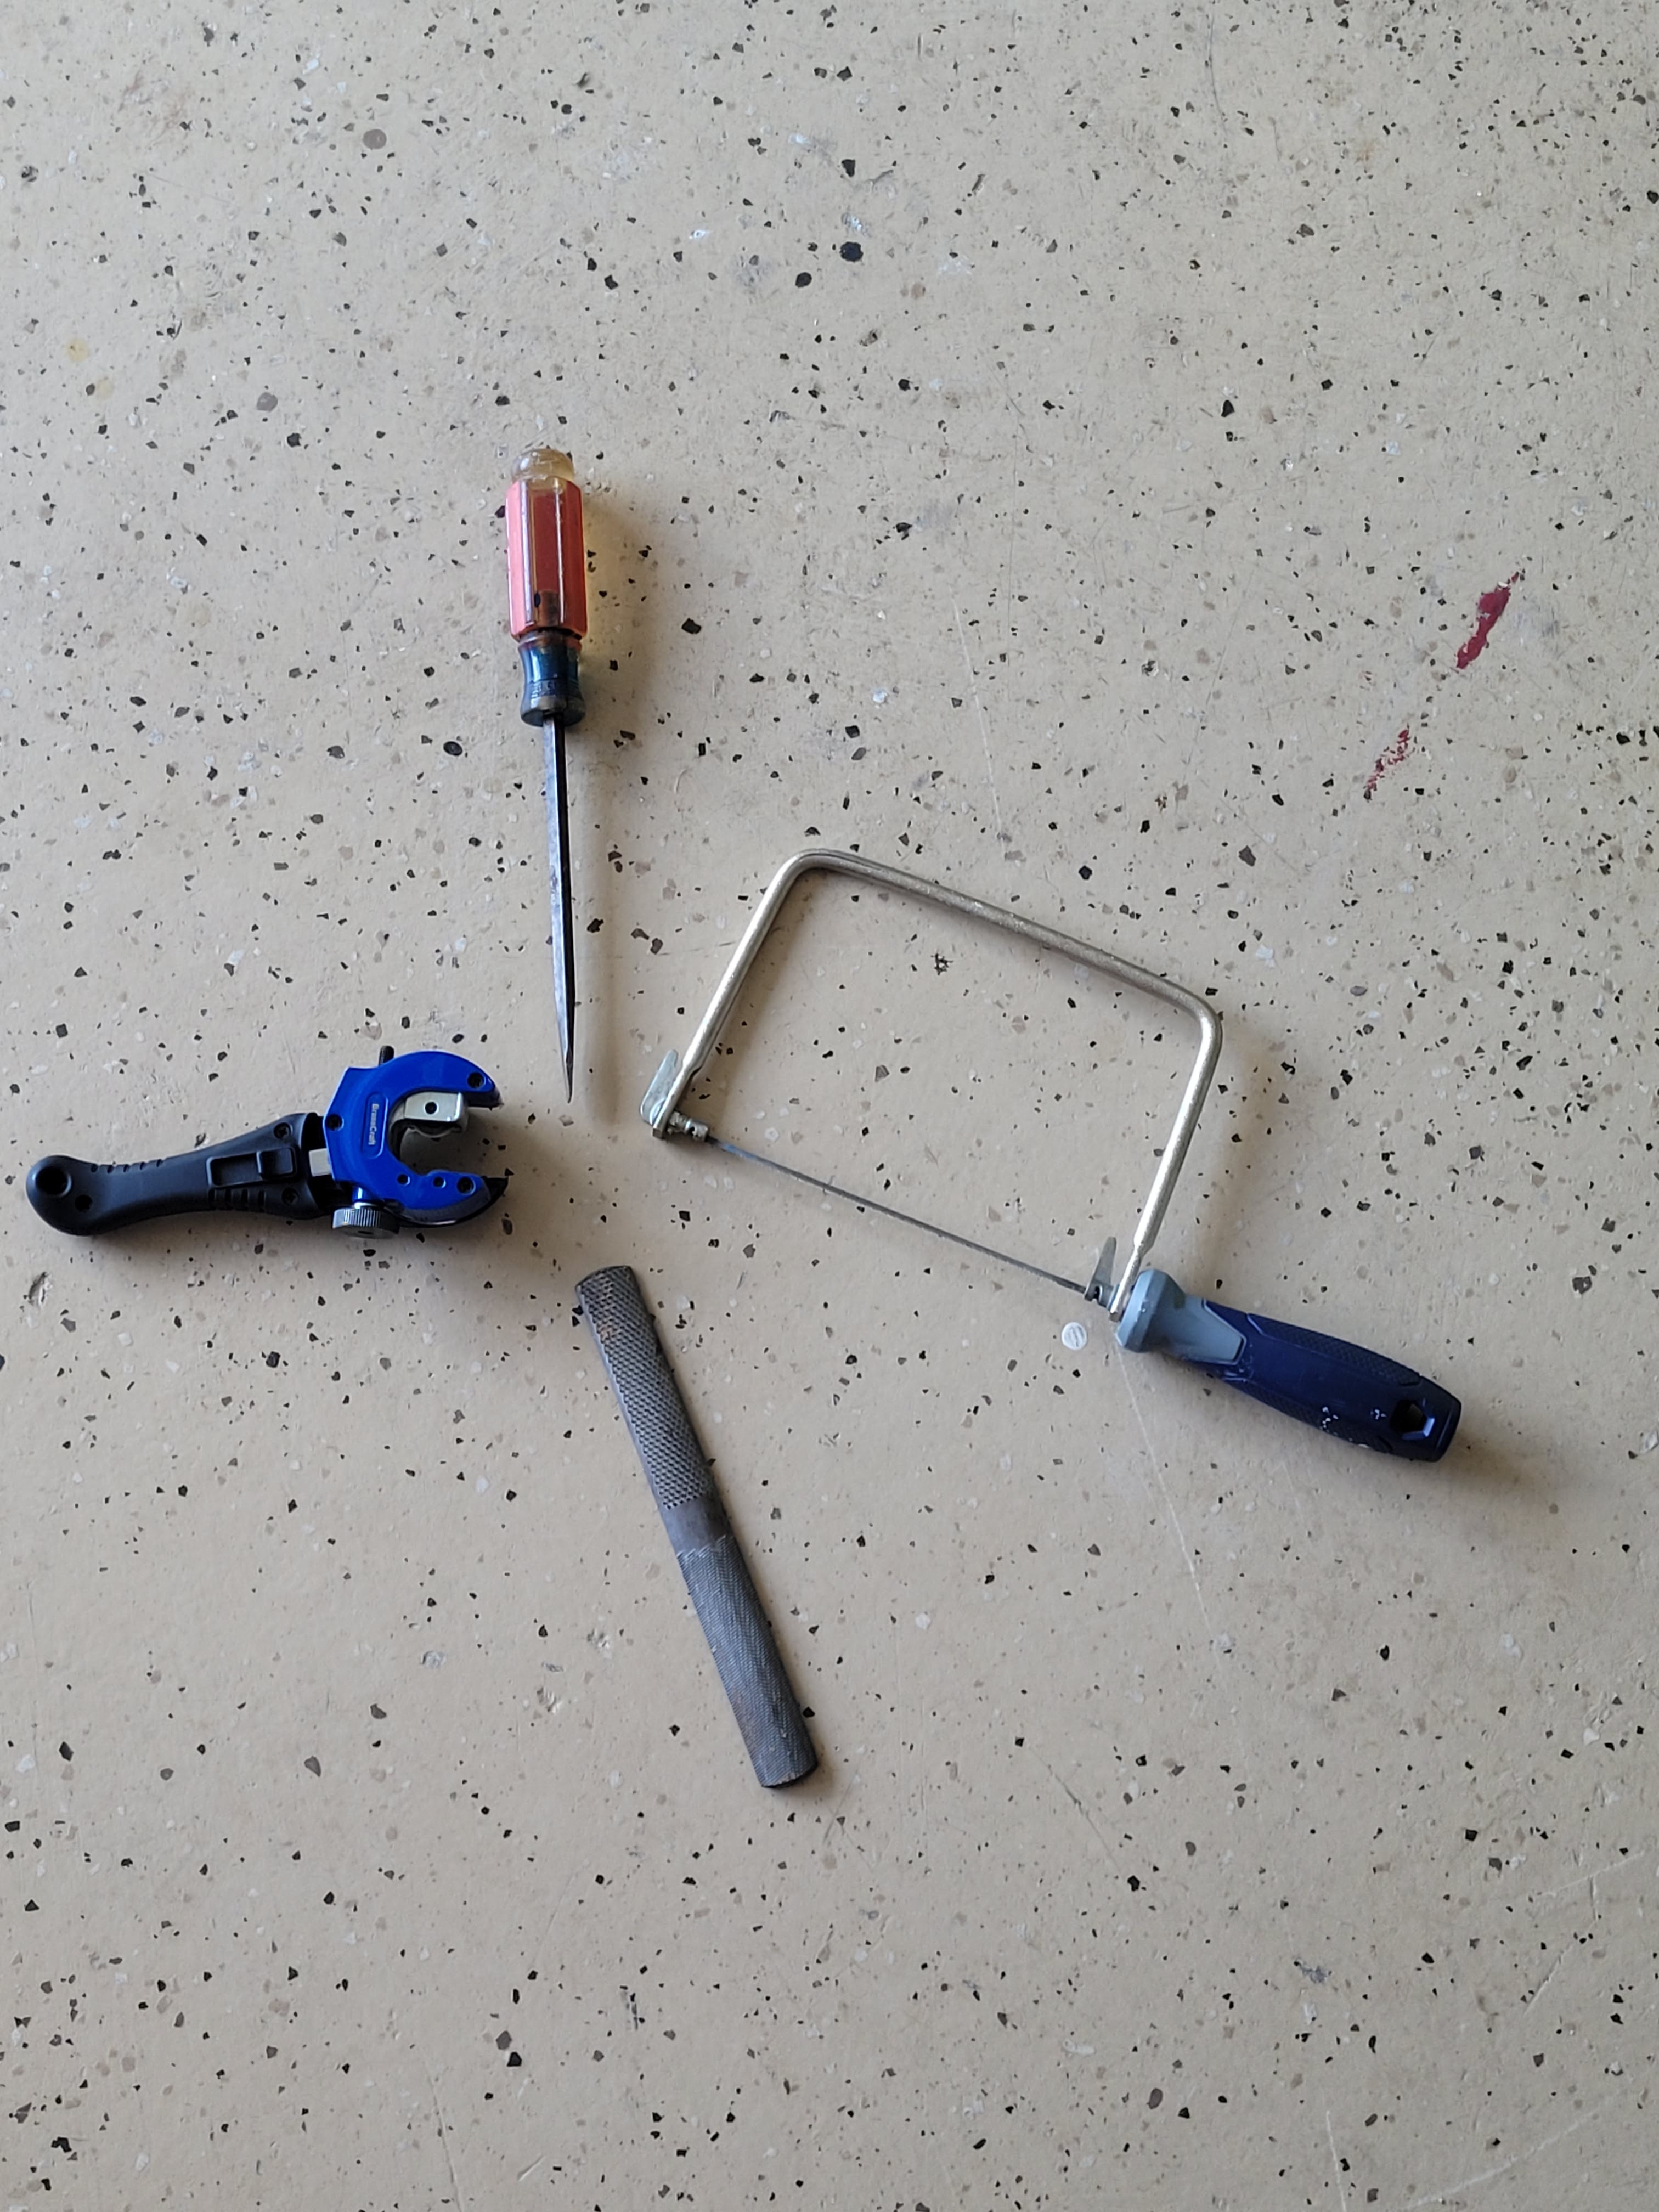
Supplies:
- Tiki lights w/metal post
- Solar landscape lights
- Dowel rod
- Belt sander
- Screwdriver
- Pipe cutter
- Small hand saw
- File
- Small screws

(If you're placing your torches in a pot, like I did; you'll need the following supplies)
- Quick dry cement
- Empty jars (dry roasted peanut jars work great)
- A few empty water bottles
- X-large flower pots
- Soil
- Plants (I have hostas in the ones shown)
Assemble:
Quick note: After a few cuss words while trying to remove the canister holder from the post Jeff (DH) decided to cut the pipe 2in below the canister.
- Remove canister
- Remove canister holder

- Measure hole, if dowel is too small go up one size.
- If the larger dowel is too big use the belt sander to make it a snug fit in the post & base of the light.


- Insert dowel
- Add light then secure with small screw.

Use in flower pots
- Grab your jar and a metal rod similar in diameter to the post for the tiki light.
- Trace around the rod in the center of the jars lid.
- Cut out hole

- Next fill the jar with Quick set cement
- Insert metal rod and allow to dry
- Once set remove rod, screw on lid, then insert light


Use in Flower Pots
- Grab your xx-large flower pot
- Place jar in flower pot
- Throw in some empty water bottles (it takes up space so you don't use as much soil)
- Then add your soil and plants.


There you have revamped tiki lights! Granted they don't keep the mosquitoes away but they look pretty and you don't have to worry about a flame.
What do you think?
sharing: will blog for comments , love your creativity, inspire me monday inspire me monday, senior salon pit stop, tuesday turn about , creatively crafty, inspire me tuesday, karins kottage party, vintage charm party, thursday favorite things, farmhouse friday
Did You Know
Featured
Lifestyle

"...You're a grand old flag. You're a high-flying flag. And forever in peace may you wave. You're the emblem of The land I love. The home of the free and the brave. Ev'ry heart beats true Under red, white and blue. Where there's never a boast or brag. But should old acquaintance be forgot. Keep your eye on the grand old flag..."
Did You Know | Flag Etiquette

"...You're a grand old flag. You're a high-flying flag. And forever in peace may you wave. You're the emblem of The land I love. The home of the free and the brave. Ev'ry heart beats true Under red, white and blue. Where there's never a boast or brag. But should old acquaintance be forgot. Keep your eye on the grand old flag..."
★I am not affiliated with any company/business shared on my website. So I do not receive any form of compensation ★


Thanks for stopping by! xo Tina
sharing: will blog for comments, love your creativity, inspire me monday inspire me monday, senior salon pit stop, tuesday turn about , creatively crafty, inspire me tuesday, karins kottage party, vintage charm party, thursday favorite things, farmhouse friday
In recognition of all the patriotic days throughout the year, and people not familiar with how to display the flag, I decided to write this post. THIS IS NOT A POLITICAL POST, JUST INFORMATIVE!
Table of content
- When To Fly the Flag 🇺🇸
- Do's & Don't for Flying the flag 🇺🇸
- How to Dispose of the flag 🇺🇸

When to Fly the U.S. 🇺🇸 Flag
- The American Flag can be flown every day from sunrise to sunset. However, if you would like to fly your flag 24/7 it should be properly illuminated.
- New Years Day
- Inauguration Day - January 20th
- Martin Luther King, Jr Birthday - 3rd Monday in January
- President Abraham Lincoln Birthday - February 12th
- President Day - 3rd Monday in February
- President George Washington Birthday - February 22nd
- National Vietnam War Veterans Day - March 29th
- Easter Sunday
- Mother's Day
- Armed Forces Day - 3rd Saturday in May
- Memorial Day - observed last Monday in May. Official day May 31st.
- June 14th - Flag Day: the honoring of the approval for the first national flag in 1777. President Woodrow Wilson declared this date the official day in 1916. Congress made the date permanent in 1949.
- Father's Day
- July 4th - Independence Day
- National Korean War Veterans Armistice Day - July 27th
- Labor Day
- Constitution Day - September 17th
- Columbus Day
- Veterans Day - November 11th
- Thanksgiving Day
- Christmas Day
- Holidays proclaimed by the President
- State Birthday - the date they were admitted
- State holidays

Do's & Don't for Flying the U.S. 🇺🇸 Flag (there are more Don't than do)
- Do - the Flag is to be flown above any other flag
- Don't - use the Flag as decoration. Use bunting instead
- Do - when hanging the Flag either vertically or horizontally make sure the union (blue with stars) is to the observers left.
- Don't - let the Flag touch the ground
- Do - when wearing a Flag lapel pin always wear it on the left.
How to Dispose of the U.S. 🇺🇸 Flag Properly
- When it is time to retire the Flag, there is a proper way. Which envoles the customary folding, burning while at attention, saluting, reciting the Pledge of Allegiance and a brief moment of silence. Once the flag is completely burned it is to be buried.

Being a Army brat & spouse I was a little amazed at what I had forgotten! What about you?
sharing: will blog for comments, love your creativity, inspire me monday inspire me monday, senior salon pit stop, tuesday turn about , creatively crafty, inspire me tuesday, karins kottage party, vintage charm party, thursday favorite things, farmhouse friday
Let's Create
wreaths

So, I'm just a little late posting this! Are you looking for a wreath you can use from spring thru summer? Well, this wreath may work for you. I like to use multi-seasonal wreaths...Here...and wreaths in general.
Spring & Summer Wreath | Design № 4

So, I'm just a little late posting this! Are you looking for a wreath you can use from spring thru summer? Well, this wreath may work for you. I like to use multi-seasonal wreaths...Here...and wreaths in general.
★I am not affiliated with any company/business shared on my website. So I do not receive any form of compensation ★


Thank you for stopping by.
Enjoy your week!
xo, Tina
sharing: will blog for comments, love your creativity, inspire me monday inspire me monday, senior salon pit stop, tuesday turn about , creatively crafty, inspire me tuesday, karins kottage party, vintage charm party, thursday favorite things, farmhouse friday
There's no glue involved, no figuring out where to place flowers or fillers.
Supplies:
- 1 Magnolia leaf wreath, 20in

- 1 Fern wreath , 20in

- 4 black or green zipties
- Ribbon of choice
- Floral wire (optional) for bow
- This wreath holder (optional)
- Small eagle flagpole finial (optional)
- Tin shears (optional) to cut wreath holder
- Glue (optional) if using finial & holder
- Magnetic wreath holders
- Drill (optional)
- Glue (optional)

ASSEMBLE:
- Do not fluff Magnolia wreath. You need it flat.
- Place 2nd wreath face down, then place Magnolia wreath face down on top of second wreath, making sure they're aligned
- Very carefully add zipties, tighten each ziptie, make sure your wreaths are even, and secure.
- Turn over, fluff, add bow using floral wire and hang


With Wreath Holder:
☆☆ We have a storm door, so the wreath holder had to be cut in order to fit properly. If you have a regular front door omit cutting the holder. ☆☆
- Hang wreath on holder. Hang holder over storm door to determine where to cut and mark.
- Remove holder and wreath. Using Tin snips to cut on mark.
- Next drill a hole, for the magnetic hook, in holder.

- Hang wreath on holder. Tie bow onto candle cup arm.
- Then glue finial into candle cup.

And there you have a simple wreath for Spring and Summer!

sharing: will blog for comments, love your creativity, inspire me monday inspire me monday, senior salon pit stop, tuesday turn about , creatively crafty, inspire me tuesday, karins kottage party, vintage charm party, thursday favorite things, farmhouse friday
Subscribe to:
Comments (Atom)
